Eating outside the Box


My name is Renee. I'm a mother of two, wife of one. I have always loved food- maybe even a little bit too much. But as with all aspects of life, after having two little ones in quick succession, my perspectives on food began to change. Doesn't every mother want to feed their child the best possible things that she can? As I researched deeper and deeper into the way we eat, where we get our food, where it comes from, and how it's grown, the evidence against the way we're doing things began to stack up-high. (If you're interested- and you should be- the health of yourself and your family depends on it! I suggest starting with a few good documentaries. Food, Inc. is great, and so is The Future of Food and Food Matters. All 3 are available to watch instantly on Netflix, too! Check out the very bottom of this page for a great selection of resources to get you started.) Why are we feeding our cows corn and animal by-products when God designed them to eat grass? Why, when they're fed grass, do they actually become HEALTHY for you, rather than the dreaded red meat of today's media? It began to amaze me more and more that when food was grown and eaten as God intended it, it suddenly became healthy for you! Many of my family and friends probably believe that our family has decided to eat 100% organic because it's healthier. This is a false assumption. We decided to eat 100% organic because it's healthy- period! The way that 'science' is messing with the food- corn that has internal pesticides, crops that can be sprayed continuously with poison and survive, is not only creepy, it's dangerous. When you follow the money trail, it becomes easy to see how these frankenfoods end up in our grocery stores- the same people who are developing them are the ones overseeing them for 'safety'. Yikes, talk about a conflict of interest!


I could go on for days, but I won't. I'll just tell you that this blog is being created so that I, a wife and mother, can share with you, just how you CAN help to change things. Eat healthier- and ditch your brainwashing! Eating healthy DOESN'T mean it has to taste bad! That's just what the processed food commercials have made you believe. Follow me on a journey of deliciousness, and take baby steps! If you can't go all organic, just try to get it wherever you can. Definitely start by avoiding GMO foods. You can visit the Non GMO Project to download and print a guide to brands and products that have been verified as Non GMO. You can also support local farmers by buying local, or visiting Farmer’s Markets. Did you know the average product in the supermarket travels 1500 miles before it gets to your store? That means they pick stuff before it’s ripe and use unnatural ways of finishing it off- like ripening tomatoes using ethylene gas. Try to get stuff that’s in season whenever you can, because it’s more likely to be grown locally that way! Does it require a little sacrifice on your part to do so? Absolutely. No more eating out. A little bit of a tighter food budget. But believe me, we aren't rich, and we are making it happen. If there's anything in this world worth investing in, it's your family's health. Wouldn't you think? The Lord gave us so many wonderful gifts in food, and He wants us to enjoy them. Food can be healing and can bring families together after a busy day to sit at a table and enjoy each other's company. Food is one of the most powerful aspects of your life. It's IMPORTANT! And it's NEVER too late to start eating healthy- it's proven that one good meal starts reversing biological damage. Just one good meal! Cooking CAN be fun, and it CAN be simple. And as consumers, we are voting for the type of food that we're going to see produced in the future, whether we like it or not. Remember, you are what you eat. What will your vote be?

Saturday, October 30, 2010

Almond Crusted Fried Mozzarella Cheese Sticks

Melty, gooey...oh, it's love.
To say that fried cheese was my favorite restaurant stand by growing up is probably an understatement. I could easily polish off an order on my own, and frequently did so. Sometimes I ordered it as my meal, sometimes I ordered it with my meal, but I always ordered it.

There’s something so attractive about fried cheese. The crunchy coating? The gooey, melty center? The beautiful melding of flavors as you bite into a marinara-drenched morsel? I’m not sure, but it may be a combination of all of those factors that makes it so appealing to not only myself, but the young and young-at-heart all over the nation.

Although the whole idea of fried does imply a certain amount of unhealthiness, there are a few things you can do to improve this favorite snack and feel less guilty serving it up, all the while earning major brownie points with the kids or your guests. I hope the tips below will help you to enjoy a guilt-free snacking session with the whole family!

Click to Enlarge
Ingredients:

 
Fresh Mozzarella Cheese
Marinara Sauce
Almonds
Garlic Powder
Basil
Eggs
Olive Oil


Step One: Slice The Cheese

Now, when we talk about mozzarella cheese, we aren’t talking about string cheese or shredded. We’re talking those delightful little balls you see near the deli section, wrapped up tight in saran. You’re going to need about a half a pound, so look for one around that size. Or if you’re feeling adventurous, make your own! It doesn’t take much time (about half an hour) and it doesn’t take many ingredients. We’ve got a recipe for it available here. It’s a fun activity with the kids, and you can really impress your friends when you tell them you’ve made your own cheese. Not to mention that’s about the only way you’re going to be able to get fresh, grass-fed, raw milk mozz. All other kinds will be pasteurized already, most likely grain fed, and most likely made from skim instead of whole milk. It just lacks the flavor and fulfillment of a real cheese!

So take your cheese ball, and slice it into whatever size you find aesthetically pleasing. Try not to go too thick, or you’ll end up with fried cheese that’s cold in the middle. 1/3 of an inch is a great size!

Step Two: Dip and Coat

Now you’ll need to do an egg wash. Just crack an egg in a bowl and whisk it lightly. Then take your food processor, blender, or Ninja (I love my Ninja!) and pour in some almonds (1 cup) and some garlic powder (1 tsp) Cover and pulse until you have a pretty fine almond meal. Pour part of it on a plate. You never want to put all of it on the plate at once, because if you’ve made too much, you will contaminate the whole lot with raw egg and you’ll have to throw out the left overs.

Take your slices of mozzarella and dip them in the eggs, then coat them with almond meal, pressing firmly on both sides to ensure it sticks. Arrange them all in one layer on a plae and continue until you’ve coated them all.


Step Three: Repeat! Repeat!

That’s right, you have to do it again! If your egg is running a little low, whisk up another. Then dip and coat all of your cheese slices a second time. This step is critical: given the gooey nature of hot cheese, if they aren’t well sealed, you’re going to have a pan full of icky gooey mess instead of beautiful individual cheese sticks. Once you’ve done all of your slices a second time, cover with plastic wrap and let sit in the fridge for ½ hour to chill. This is a good time to clean up your mess! Yes, I can tell you made one. Go ahead, clean it up. You’ll feel better later.

Step Four: Fry it up!

About 5 minutes before you want to start cooking, put a small layer of oil (regular olive oil, not extra virgin, or you can use coconut oil or palm oil.) into a pan with high sides. Just enough to coat the bottom is fine, we aren’t going to deep fry these! Let it heat on medium low.

Grab your cheese and gently place several into your oiled pan, being careful to avoid oil splatter! I know you’re excited to try them, but do several small batches even if you can fit all of them in the pan at once. Every time you put a new slice in you make the temperature of the oil go down. So you’re going to have to cook them longer if you put too many, and they won’t cook evenly or brown as nicely.

After a minute or two, flip all of them over and cook for another minute. They don’t take long! If you leave them for too long, all the coating in the world won’t save you- you’re going to have a big blob of greasy cheese in your pan. Take one out and slice in half just to make sure it’s heated through, then repeat with the rest of your batches, adding more oil if necessary.

Serve immediately with warm marinara on the side. Yuuuum-my!


Tuesday, October 26, 2010

The Hummus Among Us

For some, hummus comes naturally. They take a taste, and their eyes grow wide with joy, their tongue freezes in pure bliss. It’s a combination of simple taste and creamy texture that can be explained as nothing less than perfection. To others, it’s an acquired taste. A hesitant hand dips a pita chip into the beige unknown and then brings it to a waiting mouth. The verdict? Not much to say about it either way. And yet everytime the strange substance presents itself at a party or among snacks that your spouse sets out for the guests, you find yourself inexplicably drawn to it. You taste it again. And again. By the fourth or fifth time, you sincerely enjoy it. After that, it becomes somewhat of a favorite in your weekly palette.

Wherever you’re at, Hummus can meet you there.  I hope you enjoy this recipe. Hummus is simple to make and much cheaper (and more tasty) when you make it yourself.


Click to Enlarge

Ingredients (All organic, as always!)

Chick peas (AKA Garbanzo Beans)
1 Lemon or Lime
Tahini (sesame paste)
Salt
Olive Oil
Roasted Red Peppers (optional)
Garlic


Step One: A Good, Long Soak

You’re going to start with two cups of dried garbanzo beans. Place these in a large mixing bowl and fill it with filtered water. Then relax- you have to let them soak for 12 hours. When they’re done, they’ll have expanded to about five cups worth!


Why is it important to use filtered water, you ask? There are, as usual, a myriad of reasons. First, there’s chloride. Now, many filters that claim to filter chlorine (like a Brita) really only remove the chlorine odor. If you leave water out long enough, the chlorine will evaporate. (Incidentally, did you know that taking a ten minute shower allows your skin to absorb 8 glasses’ worth of chlorine? Icky thought for the day.)

Same beans, different day!
The second reason is fluoride. Not all water is fluoridated (thank goodness!) but many sources are. Please, I beg you, do not drink fluoridated water. If your water is fluoridated, purchase a reverse osmosis filter to remove it. Fluoride is a POISON. It may help you get less cavities, yes. But it’s a poison. It is doing terrible things to your brain and your childrens’ brains. If you have an infant or toddler, do not give them fluoride supplements to help their teeth! There is a reason you are supposed to call poison control if you swallow too much toothpaste. Fluoride…is…poison. If you don’t believe me, at least do the research yourself. *End rant.*

The third is that there is all kinds of other unpleasant nonsense in the water, not the least of which is more pharmaceuticals than you could shake a stick at.  Prozac, birth control, pain pills. You name it, it’s in measurable amounts in our water sources.

If anyone has ever said to you “There must be something in the water.” He was right. I highly, HIGHLY suggest you invest in a reverse osmosis water filter. I like reverse osmosis because it gets rid of fluoride and pharmaceuticals. Do some research and find out what kind of filter is right for you, but please, get one!

Step Two: Boil, boil, and boil some more!

So in the morning, take your nicely hydrated chick peas and strain them, then place them in a large, heavy pot (I love my ceramic coated cast iron pot)and once again, fill with water. Now here is the important part! You’re going to have to have them at a hard boil for two hours. That’s right, two hours. Stir occasionally and keep covered to minimize your evaporation loss. Keep an eye on them- if you have to add more water, make sure it’s boiling when you add it. These things are important because if you don’t do this step properly, you won’t have nice, soft chick peas. You’ll have yucky hard ones.

After your two hours of boiling is up, strain the chick peas again, this time reserving the water.

Step Three: Put it all together, and what have you got?

Now you’re going to put all your ingredients (well, most of them, don’t rush me.) in your desired crushing device. I, as usual, will use my Ninja! Put all the chick peas in, then 8 tablespoons of Tahini.

Tahini Note: When you open up your Tahini for the first time, it’s going to be pretty soupy on top from settling, gently stir it all back together, until it becomes more of a peanut butter texture.

Next, add 1 tablespoon of salt, 10 cloves of garlic (you can mix it up between fresh cloves and garlic powder, but fresh is always better.) and the juice of one lemon or one lime. Puree this mix, using short pulses, until you reach the desired consistence. Hummus consistency is hard to explain in words. You’re going to have to figure it out on your own. When you stick your finger in and it’s pretty smooth and it’s pleasing to eat, then by Jove! You’ve got it!

Step Four: Extras, Extras

Here you can add in pretty much anything your heart desires. For this recipe we added scallions and roasted red peppers. I chopped the peppers up really small and added about ½ cup to the mix. For the scallions, we did about 4 tablespoons. If you taste it and you like it, then stop here! If not, get imaginative. Try adding different spices, more garlic, whatever you’d like. To ours we added some pepper, a little rosemary, and some Kirkland no-salt seasoning. Parsley or basil would also be a nice addition.

Step Five: Serve

Serve with a garnish of whatever you’ve added, such as a nice pile of red peppers or some fresh sprigs of parsley. Right before serving, drizzle with olive oil. There you have it! Lovely with flat bread, pita chips, and of course, veggies! Enjoy!

Almond Crusted Salmon with Asparagus Spears

This one is definitely a best seller in my house, sure to disappear quickly even from the plate of my finicky two year old! I started with the desire to make a slightly healthier version of fried fish. As I munched on almonds, pondering a plausible solution, it came to me. Almond meal! And so a beautiful relationship was born. This is also a great alternative to breading in just about every recipe, from chicken parm to the less formal chicken nugget! It’s a good substitute for bread crumbs for any of you low-carb people doing South Beach or Atkins, too, for instance. Almonds are packed with a great number of yummy nutrients, so don’t be afraid of them! The best way to eat them is, of course, raw. But we’ll make an exception for this recipe, ok?

Ingredients:


Click to Enlarge

Raw almonds
1 lb Salmon fillet
Garlic powder
Salt and Pepper to taste
Dill
Lemon
Asparagus
Ground Flax Seed (Optional)
Olive Oil


Step One: Prep your coating

You can do this in a blender, food processor, or (like me!) with a trusty Ninja! Put about a cup of raw almonds, 1 tsp of garlic powder, 1 tsp of dill, 2 TBSP of flax seed (optional) and ½ tsp of salt into your food crusher of choice. Then pulse it a few times, until you get a nice meal. You can use one that is coarse, or one that is very fine, it’s all about personal preference. I prefer the texture of a coarser grind, so that’s what I’ve done for this recipe.

Crack one  egg into a bowl and whisk with a fork. Now set everything aside for a few minutes, we’ll get back to it later. A note on the flax seed: lots of people try to add flax to their diet for its nutritional benefits. Unfortunately, you can’t digest flax seeds in their whole state! Make sure when you make such valiant efforts, that you consume flax that has been ground or crushed. J


Step Two: No scales, please!

Next you want to get your fish ready for coating. Depending on what salmon you buy, this step may not apply to you. We can do a quick test to see if it does or not, so don’t panic. Here we go: Look at your fillets. Do they have scales? If yes, then this step applies to you! If not, skip ahead to step three.

As of yet, there is currently NO organic seafood. There just aren’t standards for something you’re getting out of the middle of the ocean! Your best bet at this point wild caught, all natural. It’s important to be aware that due to pollution, all fish is going to have mercury in it. The bigger the fish, the more mercury, since they eat smaller fish and absorb the mercury from those as well. Salmon is one of the safest fish that’s going to be common in any given seafood section, so you don’t have to worry too much. Plus, fish (salmon especially) is one of the best sources there is of omega-3 fatty acids, essential for brain function and growth, so yeah, really important. Don’t skimp on those omega-3s! There are plant sources of omega-3, too, but they don’t compare to animal sources. Your body has to convert them to the same type as the animal omegas, and in doing so you loose pretty much all of it, resulting in only trace amounts of what you’ve consumed. Try to eat a good omega-3 animal source, like salmon, twice a week.

You might think at this point, “Why don’t I just get farm raised salmon? Wouldn’t they have less mercury than their wild counterparts?”

It may be true, I’m not sure. But I do know that most fish farms feed their fish pellets composed of crushed up chicken feathers. Why? Because the factory farms don’t have a good use for the quadrillions of feathers they rip off their chickens each year, and they want to get every penny they can. It’s a cheap food source for fish farmers. And it’s completely unhealthy. Fish aren’t supposed to eat feathers! Unless you can verify that your farm source is practicing ethically, stick to wild caught. Fish eating feathers just aren’t getting what they need- why would you think any different concerning the people eating those feather fish?

Ok, now, let’s skin that fish! Some  people use a knife. I buy Full Circle’s frozen fillets from Big Y and never have to, though. I find that by just grabbing the fish at the corner and pulling gently at the skin, I am able to pull the whole piece away without too much trouble. Try to start on the thinner side of your fillet so that you don’t end up pulling the flesh away with the skin. You will still have a thin ‘film’ of skin when you’re done- this is fine to cook and eat!

Step Three: Dunk and Coat

At this point you’re ready to pre-heat your pan. You want to put two or three tablespoons of olive oil in it and heat on medium low. This is important, don’t cook on high with olive oil! Once the olive oil starts smoking, it has turned from a good, healthy fat, into a bad one. Cooking with lower temperatures will help prevent this transformation from taking place.

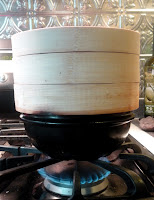
You also want to get your asparagus ready. I am using my handy bamboo steamer, but you can use any method you prefer- asparagus is very versatile. I like the bamboo steamer because unlike metal steamers, it does not collect water on the surface, effectively flooding your veggies. It absorbs water, and lets them actually be cooked by the steam, as you intended to do in the first place. Lightly steaming them is fine, if you overcook them, they lose most of their nutrients. It should only take between 6-8 minutes, or until tender. If you’re using frozen asparagus refer to the instructions on the bag.


HINT: If you don’t have a steamer, that’s perfectly all right: the best way to cook asparagus is to steam it standing up! That way it cooks more evenly, because the bottoms are tough and thick, the tops are thin and tender. Place all the stalks together and tie with a little twine or a rope fashioned MacGyver style from aluminum foil. Place them upright in a pot in an inch or so of boiling water for 6-8 minutes. Beautiful!

Here’s one last handy note on your asparagus. If you’re using fresh asparagus, most people cut off an inch or so from the bottom to avoid that akward, this-is-too-tough-I’m-going-to-spit-it-in-my-napkin-and-everyone-will-stare moment. But there’s a better way to make sure you’re getting the tenderest of the tender! Hold the stalk horizontally with your thumbs and forefingers. If you hold both sides and gently bend the stalk, it will snap right where that tough part and the tender part meet. If you find that yours are breaking halfway up, it means you probably got old asparagus that was sitting in the store awhile. Sorry, pal- tough break! (Pun intended.)

Remember your eggs and almond meal? Grab them, it’s time to get down to business! Pour a little almond meal onto a plate. Don’t pour all of it- it will only take about ¾ cup to coat your fish, so you don’t want to contaminate the whole lot with raw eggs and raw fish. Instead, add a little to the plate as needed. The rest can be saved, and if you aren’t going to use it in fairly short order, go ahead and freeze it. (Looking for a great recipe to use that left over almond meal? Why not try my Fried  Mozzarella Cheese sticks?) Dip your fillets, one at a time, into the egg, and then place them on your almond meal plate. Coat all over with the meal, making sure to press it in well so it doesn’t all just fall off in the pan.

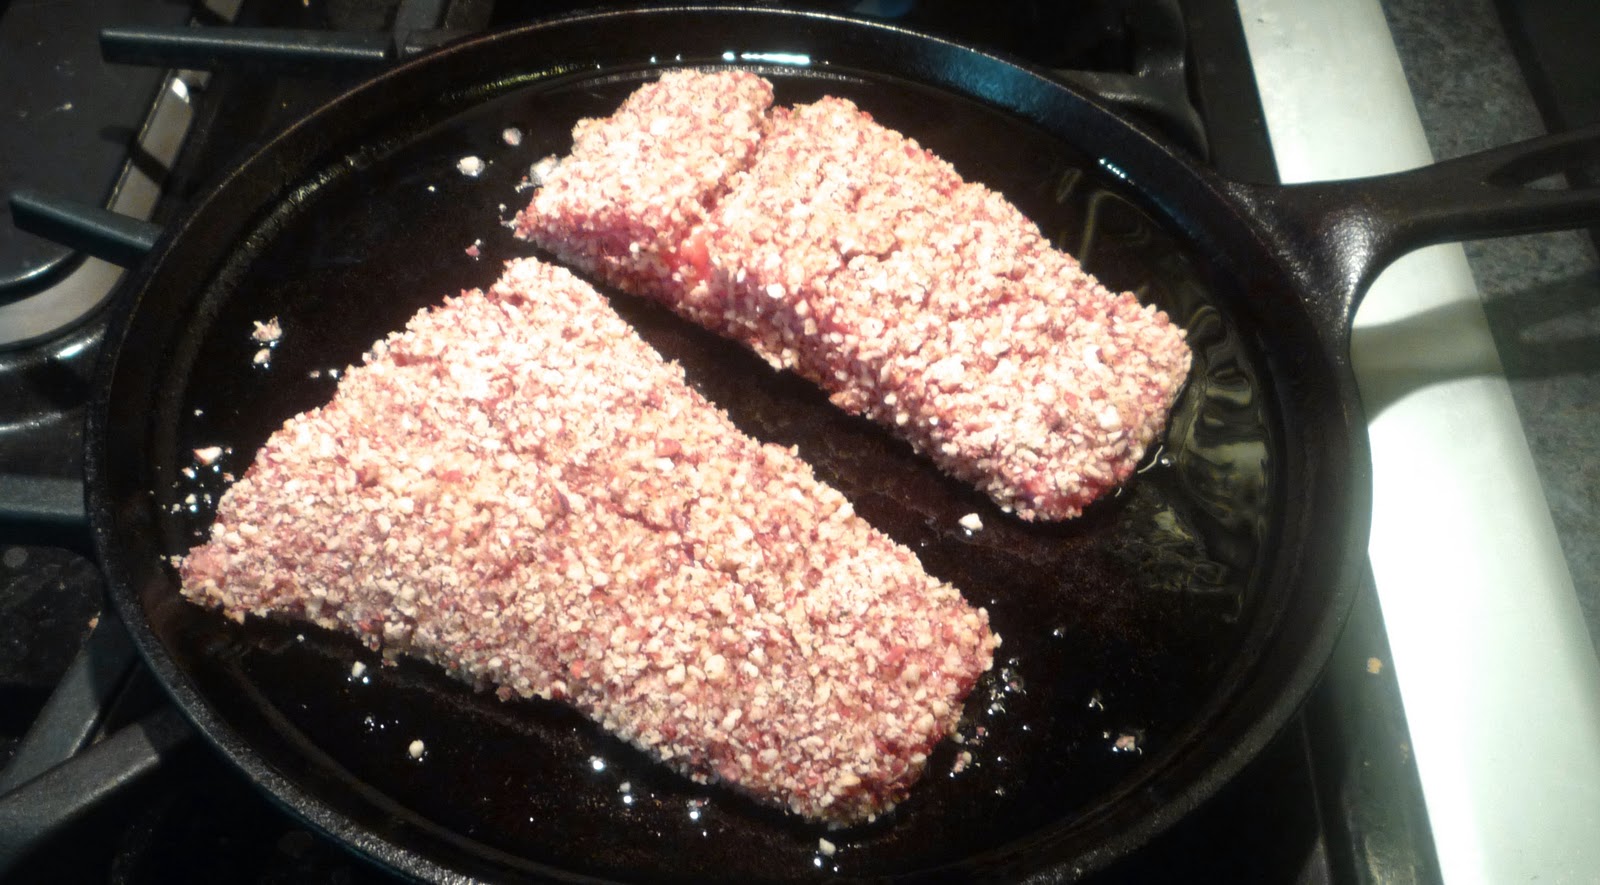
Step Four: The fish fry!

When all of your fillets are coated, place them on your pre-heated pan. As you cook, you might want to add more olive oil. Use your discretion! Cook until golden brown on one side, then flip and do the same on the other side. It will take about 5 minutes per side, but this can vary widely depending on the thickness of your fillets. You can tell they are done when there is no more translucent pink in the middle, only opaque pink. Cut into one with a knife to check, I don’t expect you to have crazy x-ray powers!


Arrange your asparagus and salmon on a plate and either bring a lemon wedge to the table or just add a squeeze fresh off the pan. Salt and pepper to taste, and serve with a hearty helping of quinoa (not pictured.) Costco sells organic Quinoa for the best price that I’ve found so far, but you can find a Bob’s Red Mill version for slightly more per pound at most grocery stores and even Ocean State Job Lot. Quinoa is a whole grain, try to store it in the refrigerator to keep it from going rancid if you aren’t going to use it right away. If you have no idea what Quinoa even is, please try it! It’s a healthier and much yummier substitute for rice that is also gluten free. It’s so tasty, it has a light, nutty flavor, and goes nice in any number of recipes as well as being the perfect side dish.

I hope you enjoy the salmon. Every time I make it, it’s almost sad how quickly it disappears. I only wish I could savor it longer!

These are some great resources!!!!